Installing WordPress can sometimes be a daunting task for beginners, but it really isn’t all that difficult. This tutorial will guide you through the process of setting up your WordPress site in a few quick and easy steps.
By following this guide, you´ll not only learn to install WordPress multisite on your server but also understand a little bit more about how WordPress works and what directory to install wordpress. Moreover, as a bonus, I will also teach you how to install WordPress on localhost as well. I’ll also help you install WordPress Multisite. But if you want more detailed info on installing wordpress on ubuntu, then you can click here.
So, let’s start!
Install WordPress 2024
How to set up WordPress?
Usually, you’ll have two options to Install WordPress. One is the automatic easy WordPress install method & the other one is manually installing WordPress. Of course the latter being a tad difficult one. So, I have tailored this guide to focus more on installing wordpress multisite manually?” part than the automatic one.
However, I will overview the automatic installation as well. So first, let’s talk about how to install WordPress automatically!
How to Install WordPress In CPanel?/on GoDaddy?
The easiest way to Install WordPress multisite is through the CPanel that your hosting provided you with. If you don’t know what a Cpanel is, then you came to the right place. A Cpanel is like a dashboard or more accurately a control panel provided by a web hosting service. This software will not only guide you through all the fresh WordPress install guide but also regulate the process of managing a site for a general user.
Of course, not all of them offer WordPress easy Install options, but most of them do. Renowned hosting providers like Hostgator will provide you domain name and a decent hosting plan. Plus, they are reliable, affordable, and effective for customer support, even after you know how to install WordPress in Cpanel. Also, the same thing applies as you install WordPress on GoDaddy.
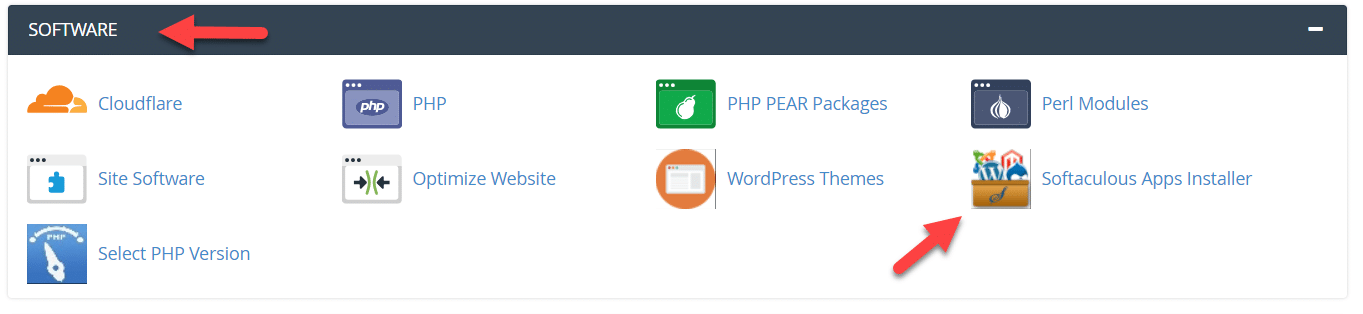
Anyway, to find this option, log in to your account of Web hosting provider and open your CPanel & find Softaculous Apps installer or WordPress Icon under automatic installers/software.
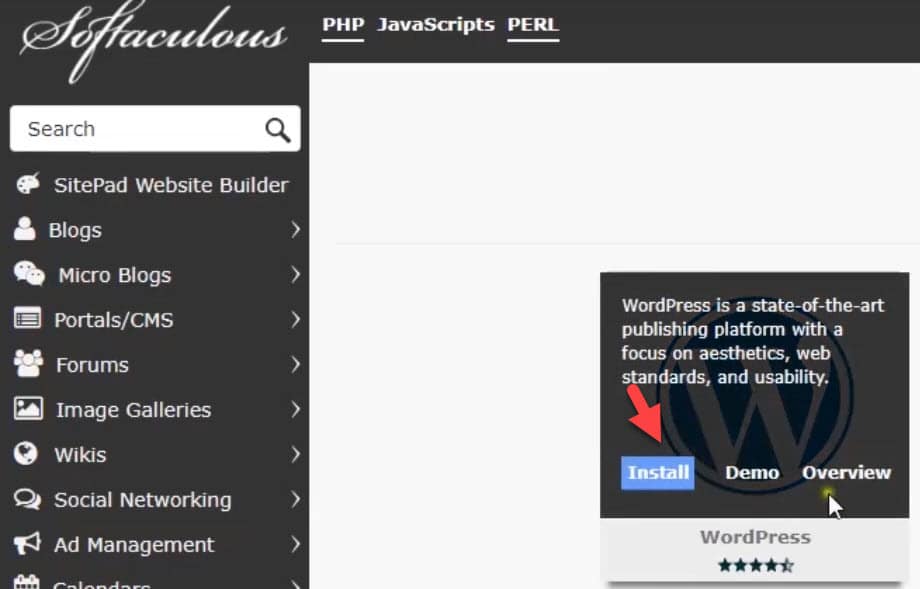
Next, select WordPress and click Install.
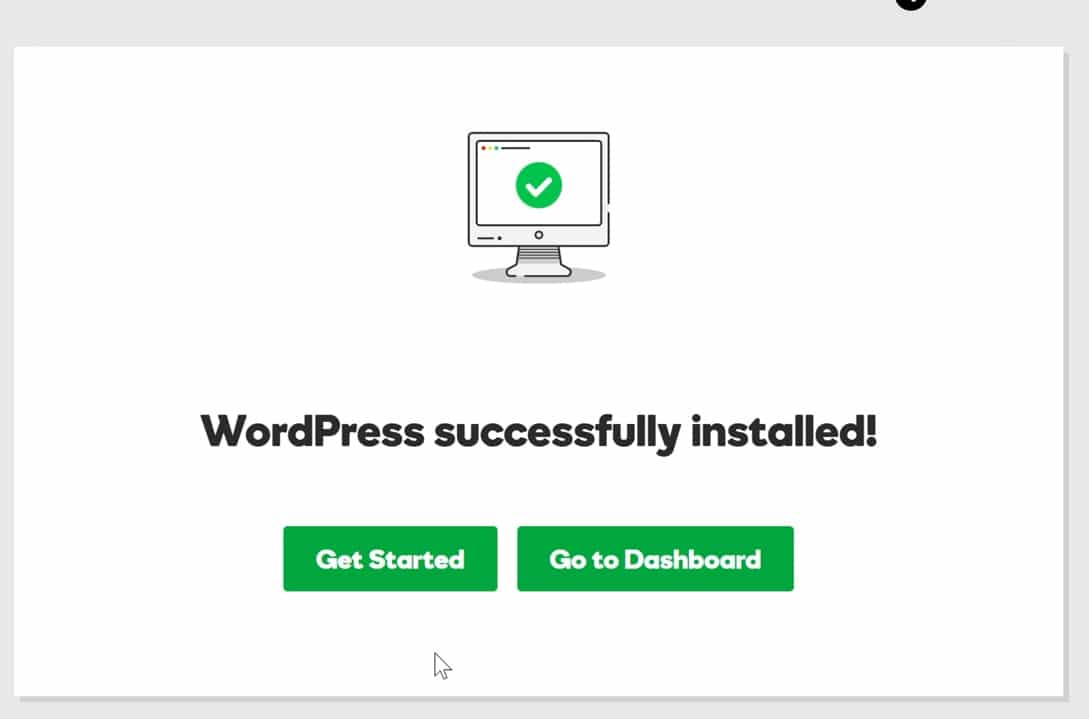
Add the required information, and you’re all done.
Now to access your WP site admin page, just add wp-admin after your website domain name, and add your specified credentials. Still confused? Well, let me explain!
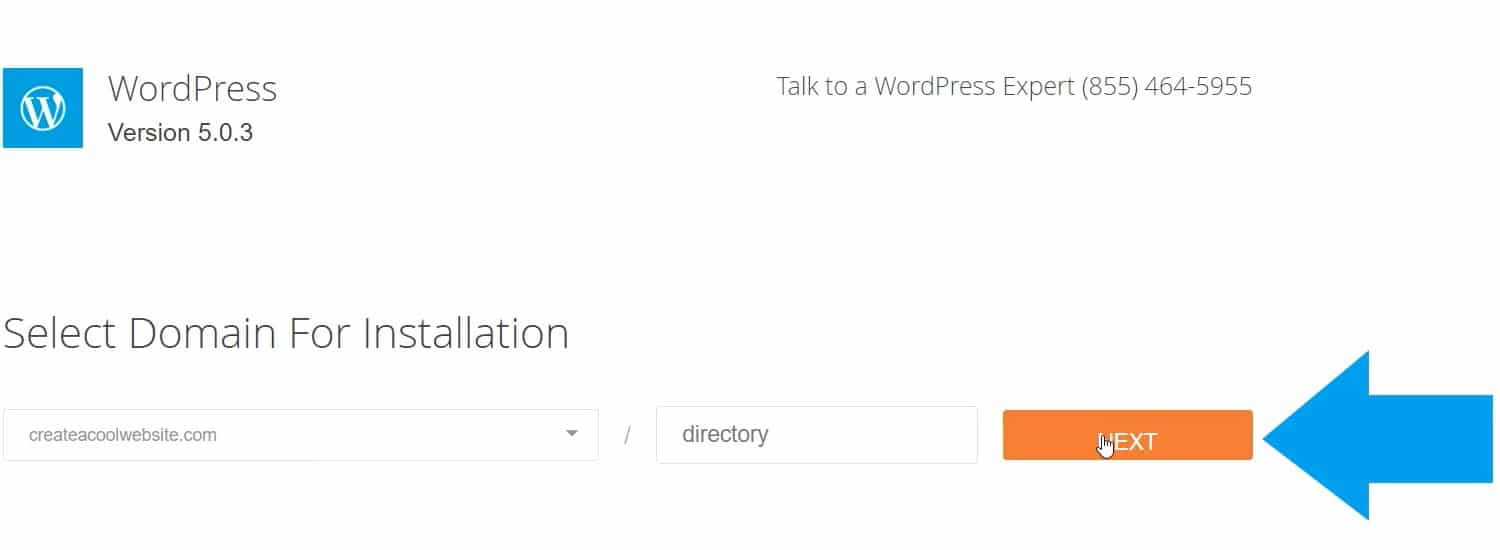
Step 1
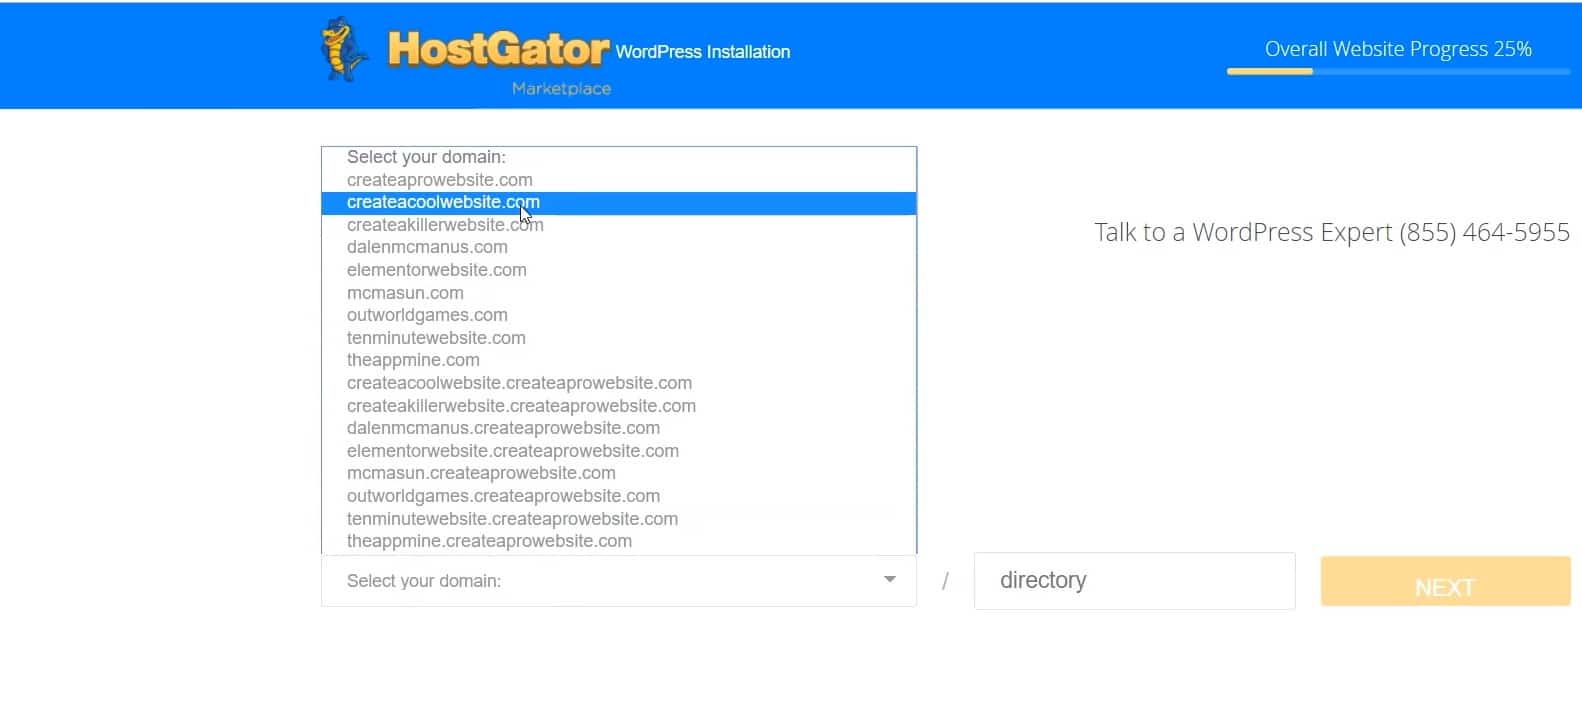
Before you start downloading the WordPress install setup, add the domain name you want to complete WordPress easy install. Now, leave the directory button as it is and click next.

Step 2
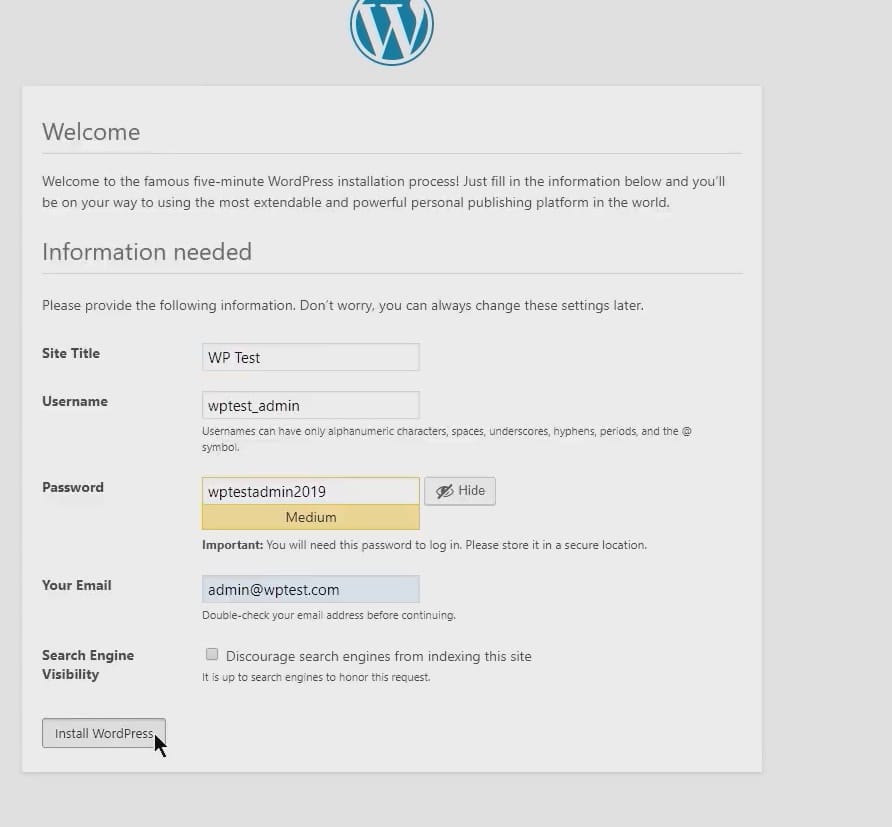
After that give your fresh WordPress install a name in the “Blog title section”. Besides, you need to provide your admin name, first and last names as well as admin email, which will be connected to your site, as specified. All, you need to do after that, is agree on the terms and condition section by ticking the respective box and select install.
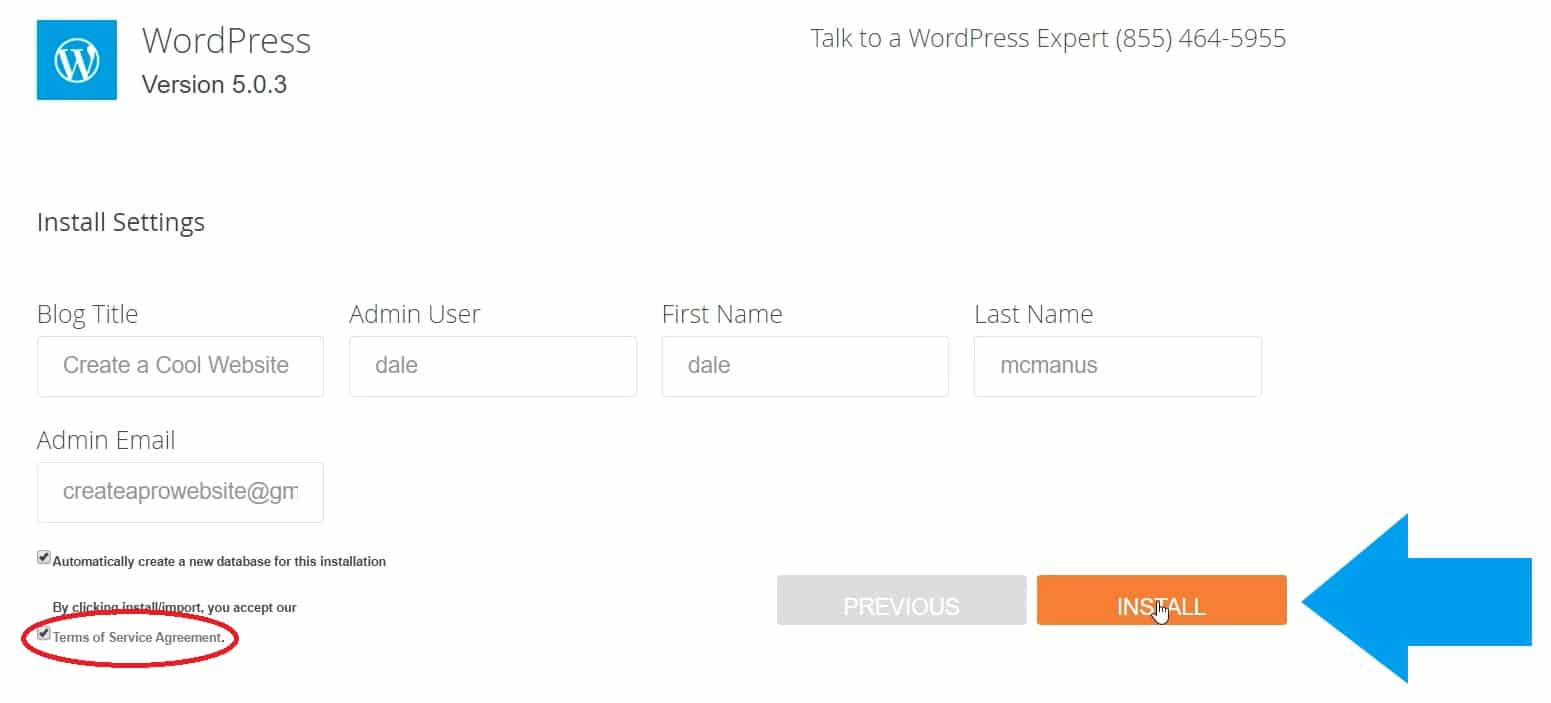
Step 3
After you install WordPress on windows, you will be brought toward a notification and login screen. One important thing you need to remember at this screen is the login information, especially the provided password. It’s quite essential if you want to login to your site and a tedious procedure you have to face, if you forget it somehow and want to reset it.
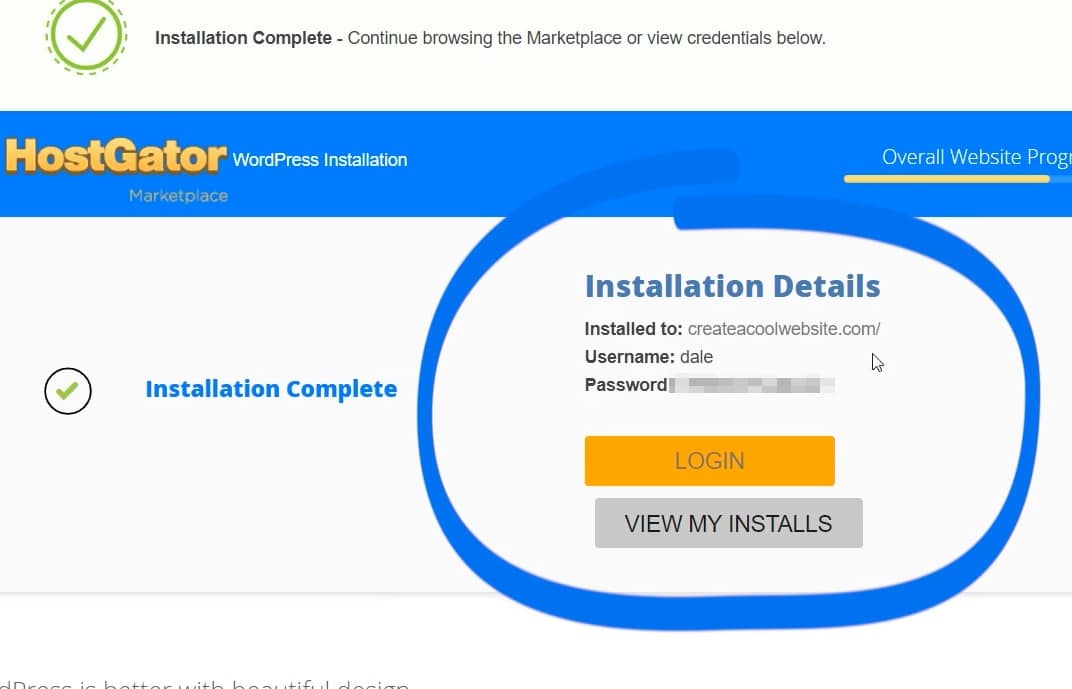
Step 4
As most of the WordPress easy install procedure is complete, so now you need to login to your functional site. A quick tip before we head on is that you need to login to your site manually instead of clicking on the “login” button every time. It will automatically disappear from the view as it will disappear, once your website is published. So, what’s the right way to login after you install WordPress locally or on ubuntu? For this, you need to type your domain name along with a slash “/” and type “wp-admin”, as shown below,

Step 5
Now type in the domain name and the provided code as you complete the WordPress install process within a new tab. Also, type in the name and the user password, which will officially login to your newly created website. So, this was how to install WordPress in Cpanel method. The same process applies as you install WordPress on GoDaddy. If it’s confusing for you, make sure to check the methods mentioned below!
How to Manually Install WordPress?
Before you start manually installing WordPress, you need to download specific tools for this task. For your convenience, here is the list of some important tools for installing WordPress that you’ll require.
During the setup, we’ll use a few tools. Some of those are probably installed on your computer already. Have a look and download what’s missing. This is what you need for manually installing WordPress:Tools of the trade
Now that you know the basic tools for the trade, next, we’ll discuss the steps to Install WordPress on your website.
Step 1: Preparation
Start with creating a new folder on your computer where you can save all notes, documents, and folders needed during the installation process. I usually create the folder on my desktop and name it wordpress_install. When done, open your text editor and create a new document. Save this as passwords.txt in your newly created folder.
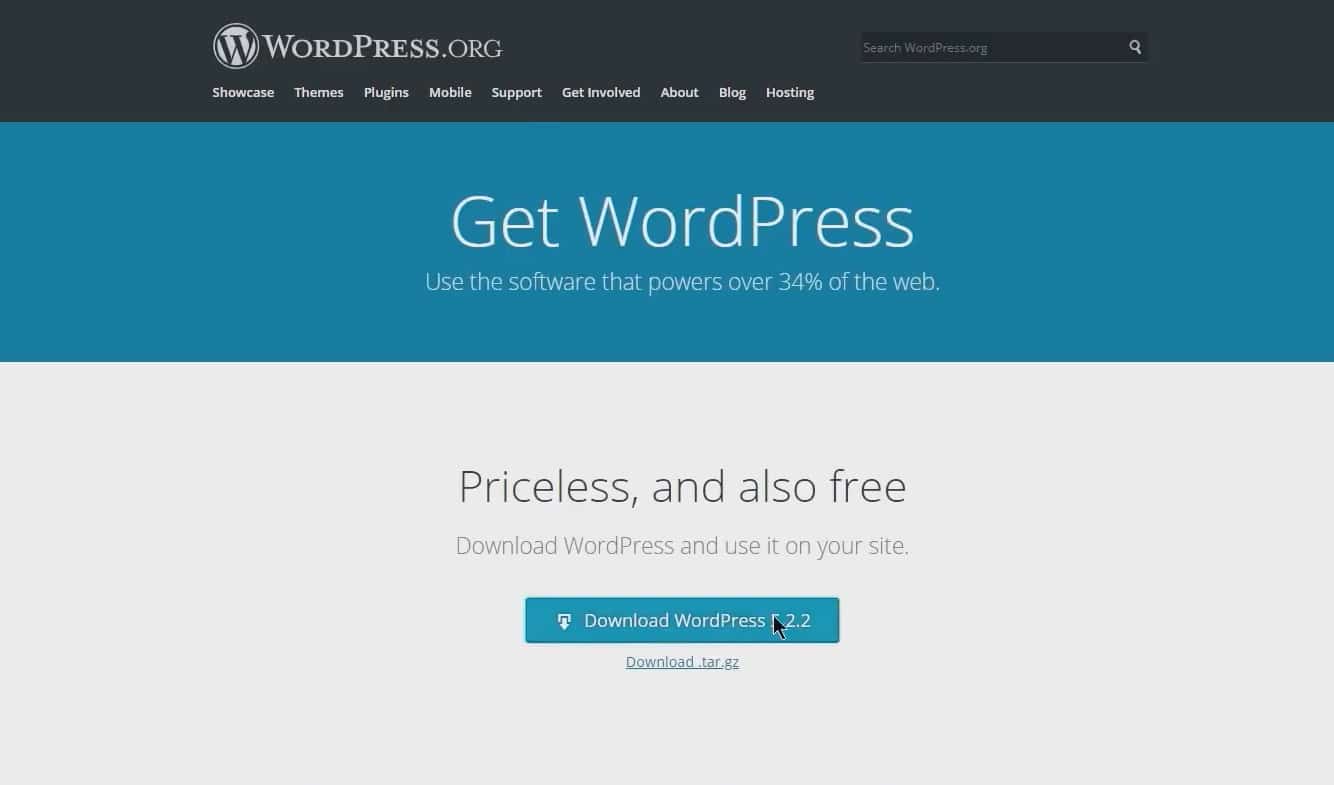
Head over to WordPress.org and download the latest release. When done, unzip the file and save it in the wordpress_install folder. You´ll end up with this:
When you’re finished, simply delete this folder, but don´t forget to store your passwords first!
Step 2: Create the WordPress database
If you’ve never worked with servers, you’re probably not familiar with the concept of databases. Don’t worry; it is really simple to understand. Just think of a database as an Excel spreadsheet, with rows and columns. Within the spreadsheets, there are different worksheets also, a database is pretty much the same.
To install WordPress multisite use this database to save all your posts, pages, uploads, and personal settings. For security reasons, WordPress can’t create the database itself, so you’ll have to do it. When done, you’ll give the username and password to WordPress.
Databases come in different flavors. WordPress uses a MySQL database.
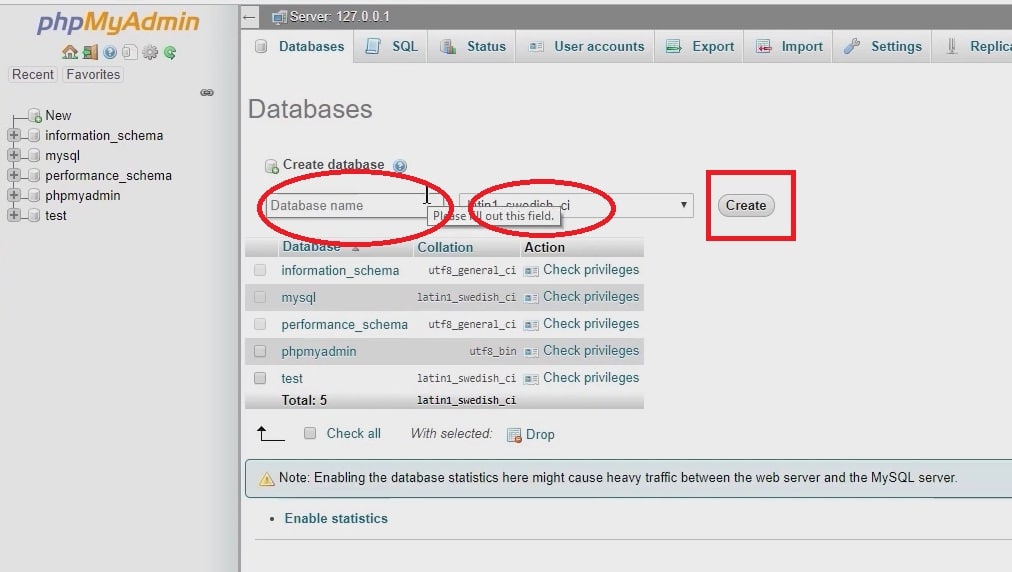
The general process for creating a WordPress database is pretty similar on different control panels, although the exact steps may be slightly different.
- Log in to your control panel with the login details sent to you by your hosting provider.
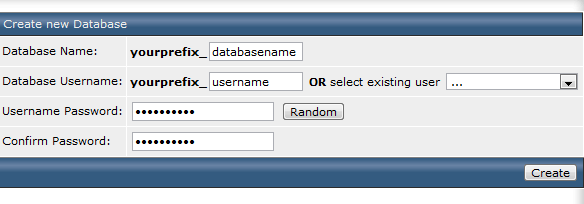
- Find the “Create a database” link (other possible names: MySQL Database Wizard or MySQL Manager.)
- Create a database
- Create a database user and password
- Add the user to the database
Copy the database name, user, and password to the password.txt file
Step 3: Edit wp-config.php
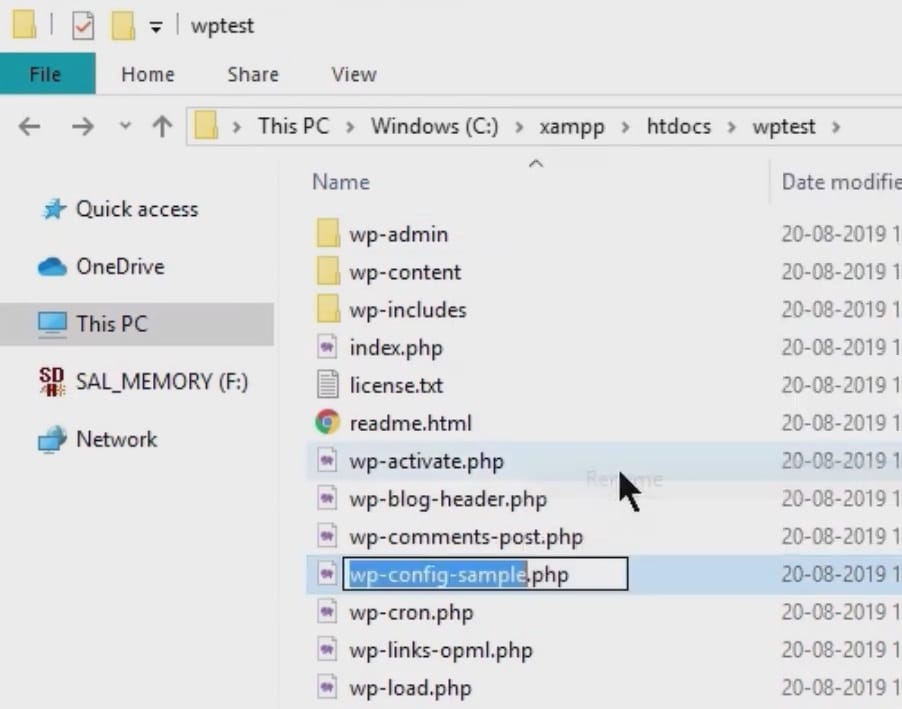
Now that our database is set up, we should pass the login details to WordPress. We´ll also configure some additional WordPress settings. Start by opening the file wp-config-sample.php that you’ll find in the WordPress folder.
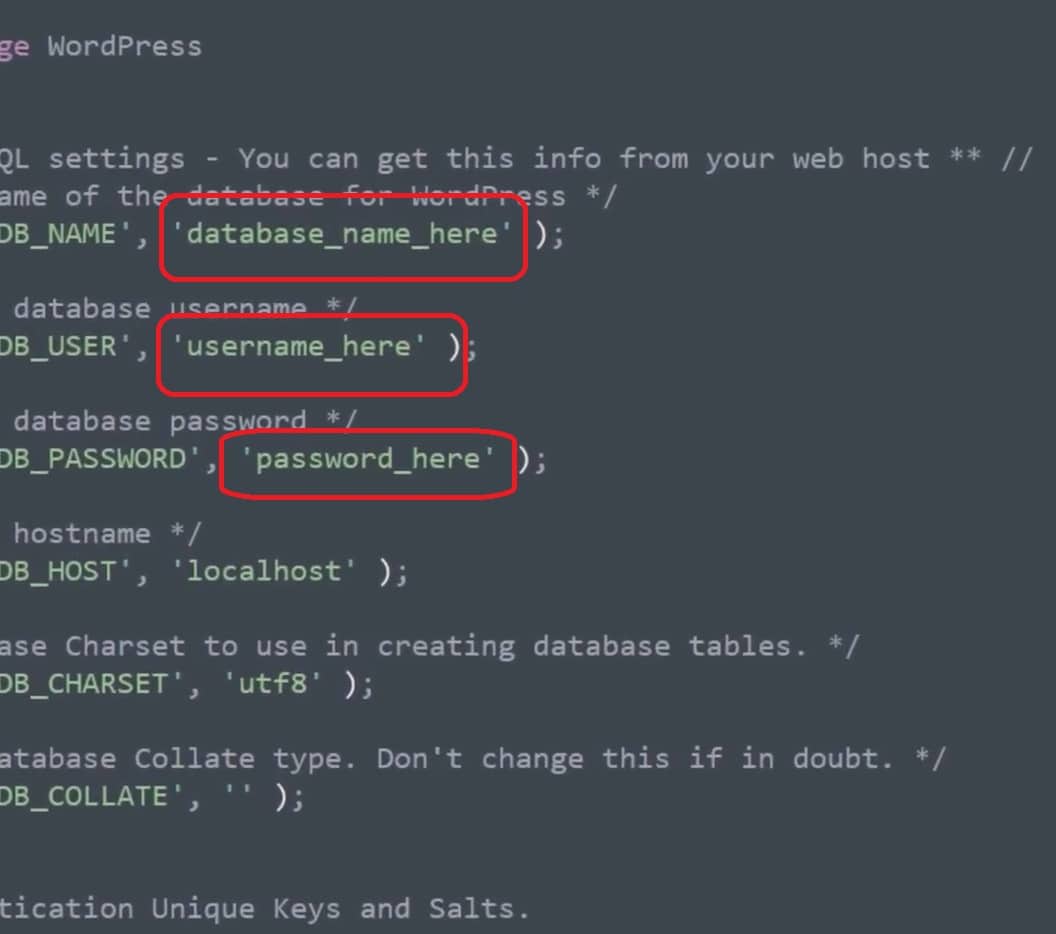
- Add your database name, database user, and password on the following lines:
-
define('DB_NAME', 'your_databasename'); -
define('DB_USER', 'your_username'); -
define('DB_PASSWORD', 'yourpassword');
-
- Go to the WordPress secret key service and replace the secret keys in the wp-config-sample.php file with the keys on this page.
- In the config file, look up the entry
$table_prefix = 'wp_';
Add a few random numbers and letters after the
wp_
prefix and end with an underscore. Example:
$table_prefix = 'wp_1a2b34_';
(Do not copy this example!)
- Close the wp-config-sample.php file and rename it to wp-config.php
Step 4: Upload and install WordPress
Now that we’ve created a database and provided WordPress with the login details, it’s time to get to the how to install WordPress on your website part. So, now all you need to do is upload all our WordPress files to your host server.
- Open FileZilla and connect to your server with the username and password your hosting provider sent you.
- Copy all the contents of the WordPress folder to the public_html folder on your server (or if you want to install WordPress in a sub-directory copy them to that folder).
- Go to http://www.example.com/wp-admin/install.php (replace example.com with your domain) and fill in the site title, username, and password. For security reasons, it´s better not to use the default “admin” username. Any alternative is fine. Generate a long, random password and note it down in your password.txt file
How to Install WordPress on Windows 10?
Learning wordpress installation on your Local Host or Windows 10 computer can be good for practice, and it’s not that hard. But why would you want to install WordPress on a Windows computer locally?
REASONS TO INSTALL WORDPRESS ON WINDOWS COMPUTER LOCALLY
One of the major reasons to install WordPress locally on a computer is that you won’t have to pay for the domain name and hosting plan from any hosting provider. This way you can experiment on your website and tailor it for better results, before launching it live. Besides, all your files will be stored locally on your computer, so you can install WordPress themes, without worrying anyone to notice, making it stand out from the crowd. And once it’s fully functional, you can then upload it live site.
To Install WordPress on Windows 10, follow these simple steps:
- Search Google for bitnami WordPress Software, and download it. They have multiple options so whether your Mac, Linux, or Windows user, you won’t face any complication.
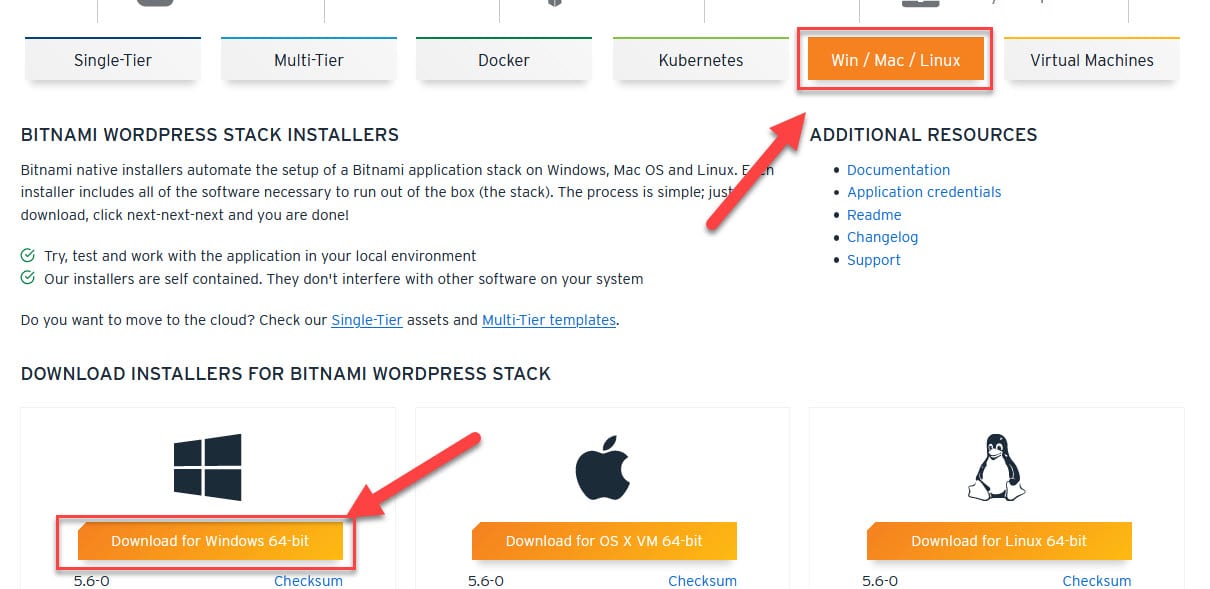
- After the downloading completes, open the installer, select your language, click next & add the required information in the setup box. Also, make sure that the component option is checked and the desired installation folder is selected.
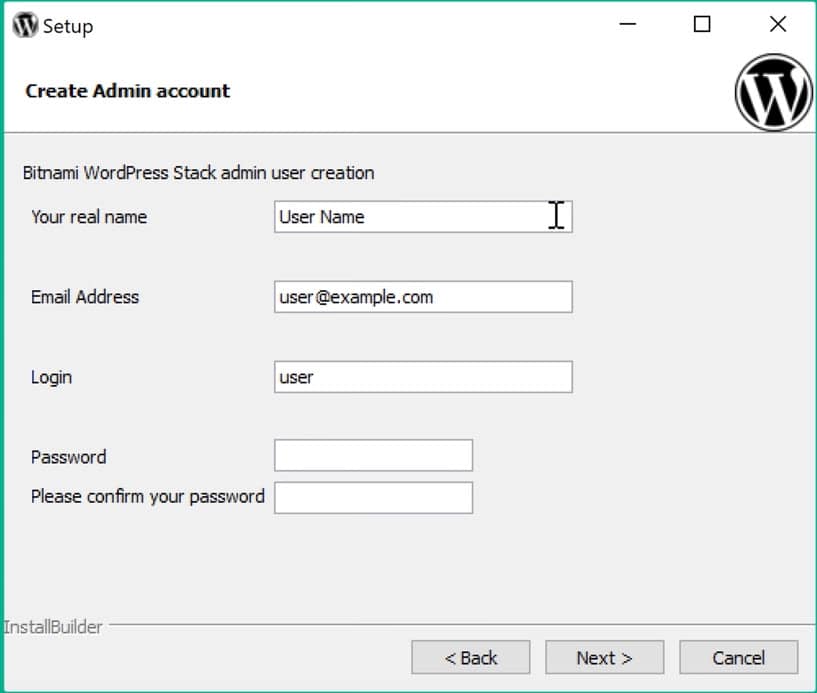
- Now as you reached to official WordPress setup, insert your name, e-mail address, login name as well as password and click “Next”. Also, at the end of the setup, you need to provide your website name.
- After installation completes, click finish. The setup will automatically open a browser page for your localhost. Click on Access WP site, and add /login at the end of the local host URL to access the login page.
That’s all there to it, but this is not the only way to Install WordPress Locally, you can use a WAMP server to do the same. It’s a bit complicated than this one, so to find out more info about that check out our related guide on How to Install WordPress locally using WampServer (WAMP).
HOW TO MOVE SITE FROM LOCAL COMPUTER TO A LIVE SERVER
Now, as the fresh WordPress install on your computer is finished, the next step to take is to upload it online. The process of moving a local site to a new domain is usually referred to as migration. But why would we want to move our WordPress site in the first place? Well,
- Maybe you brought a new domain name
- Or maybe you brought a website and wants to change the domain
- It’s also possible that you switched hosting companies
However, one of the most common reasons for this is because you entirely built your website and uploaded content and want to shift it to online medium so that the whole world can notice you! Whatever the reasons are, I am going to show you the easiest way to archive this.
Step 1: Get hosting and domain
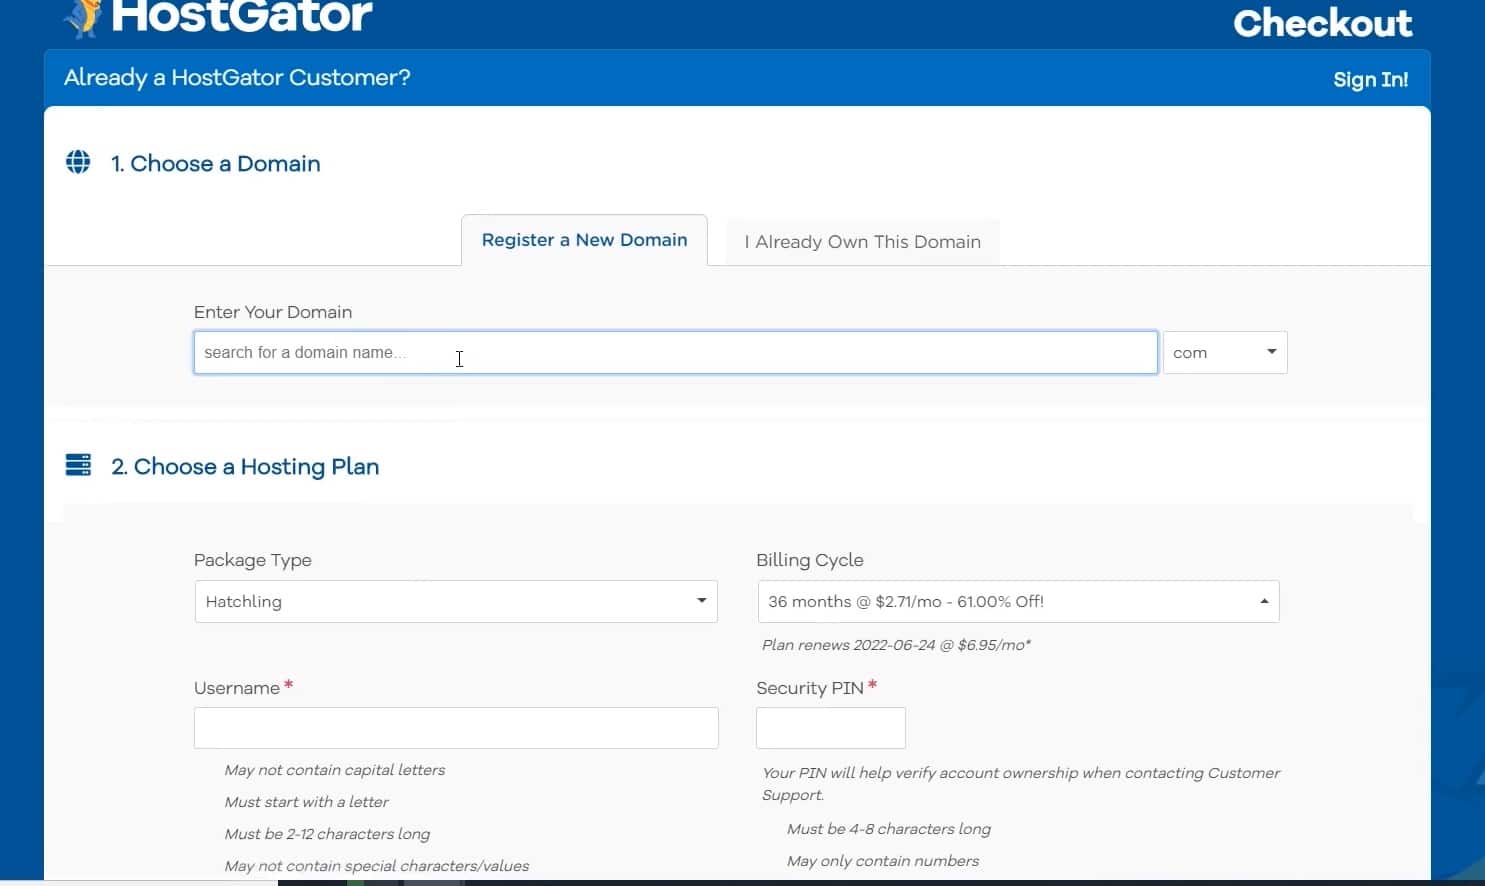
In the first step, you need a web hosting as well as the domain name. To be frank, there are thousands of hosting providers on the market, but the most renowned one is possibly HostGator. Go to their site, search out the domain name you want, choose a hosting plan and enter your billing info.
Step 2: Fresh WordPress install on the domain name
We already covered this portion above, so make sure to check it out. (one-click installation method)
Step 3: Try to install the migration plugin on the new site
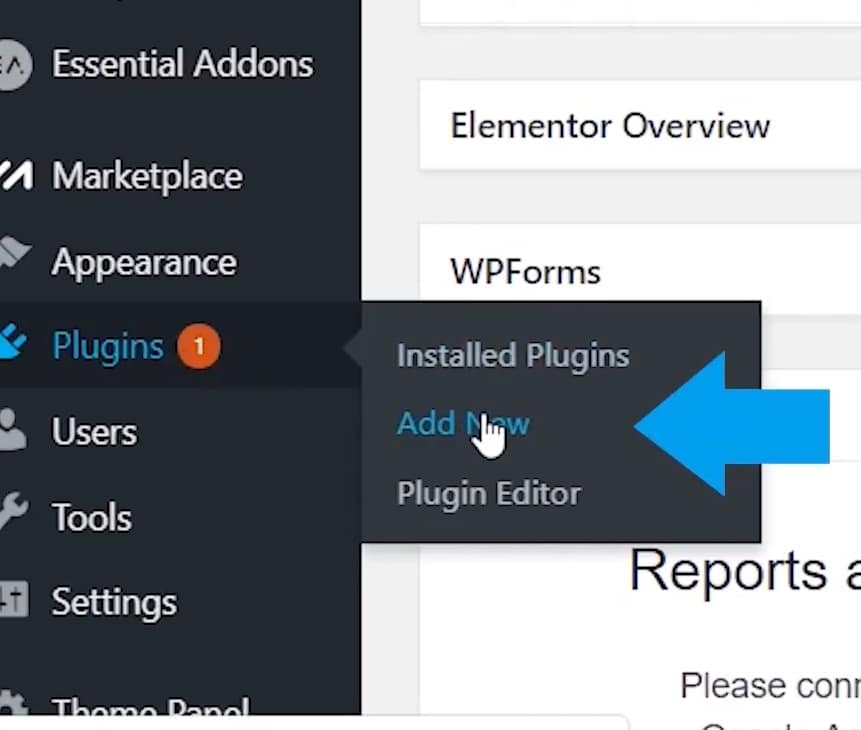
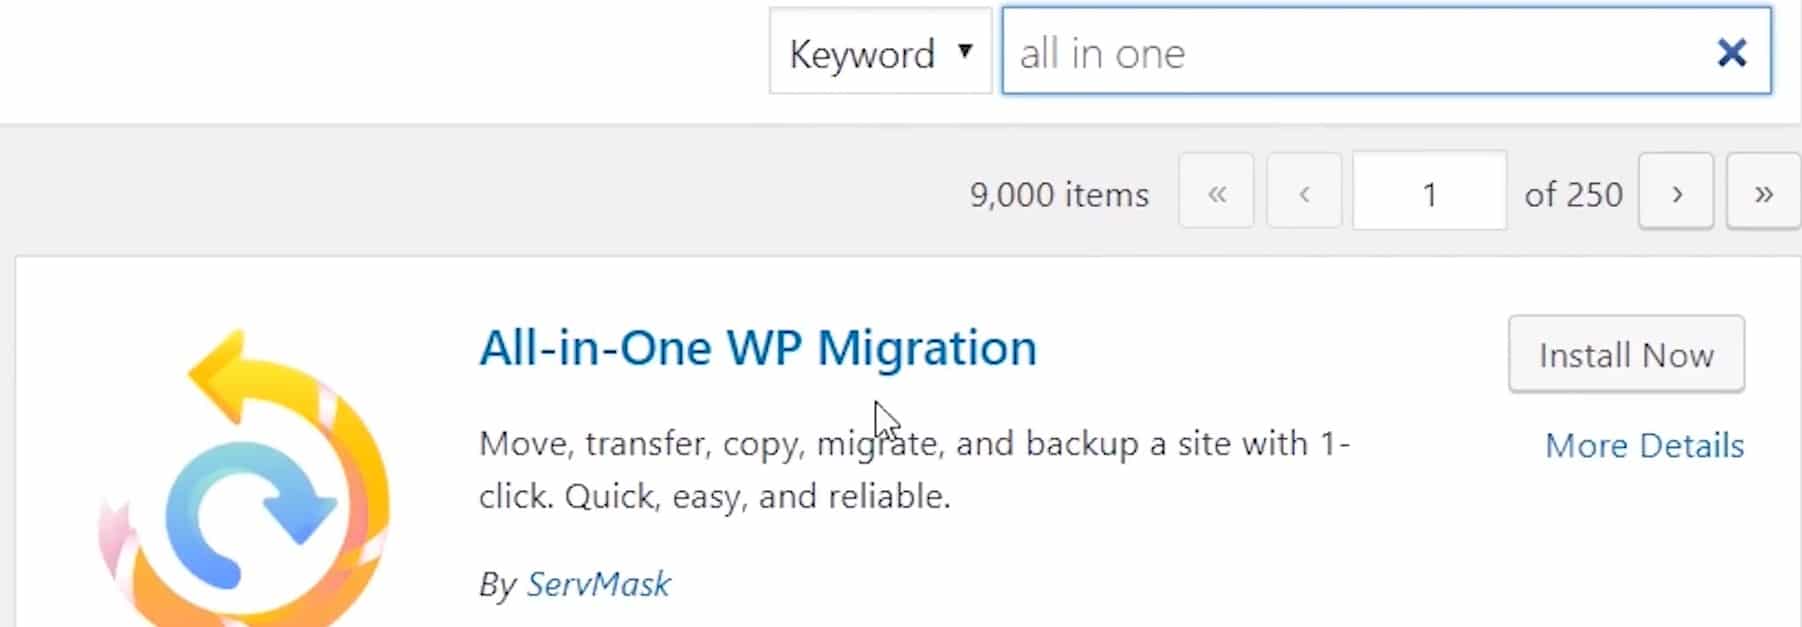
To do this, move to WordPress dashboard, select the “Plugins” sections and then “Add new”. Now search for a plugin named “All-in-one WP Migration” and try to install it and activate it.
Step 4: Migrate your site from local to online
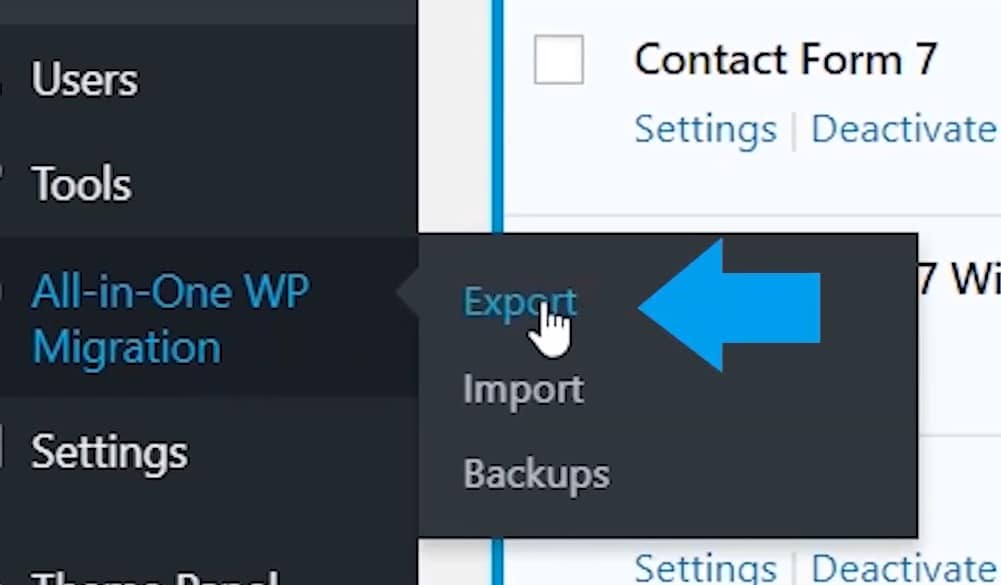
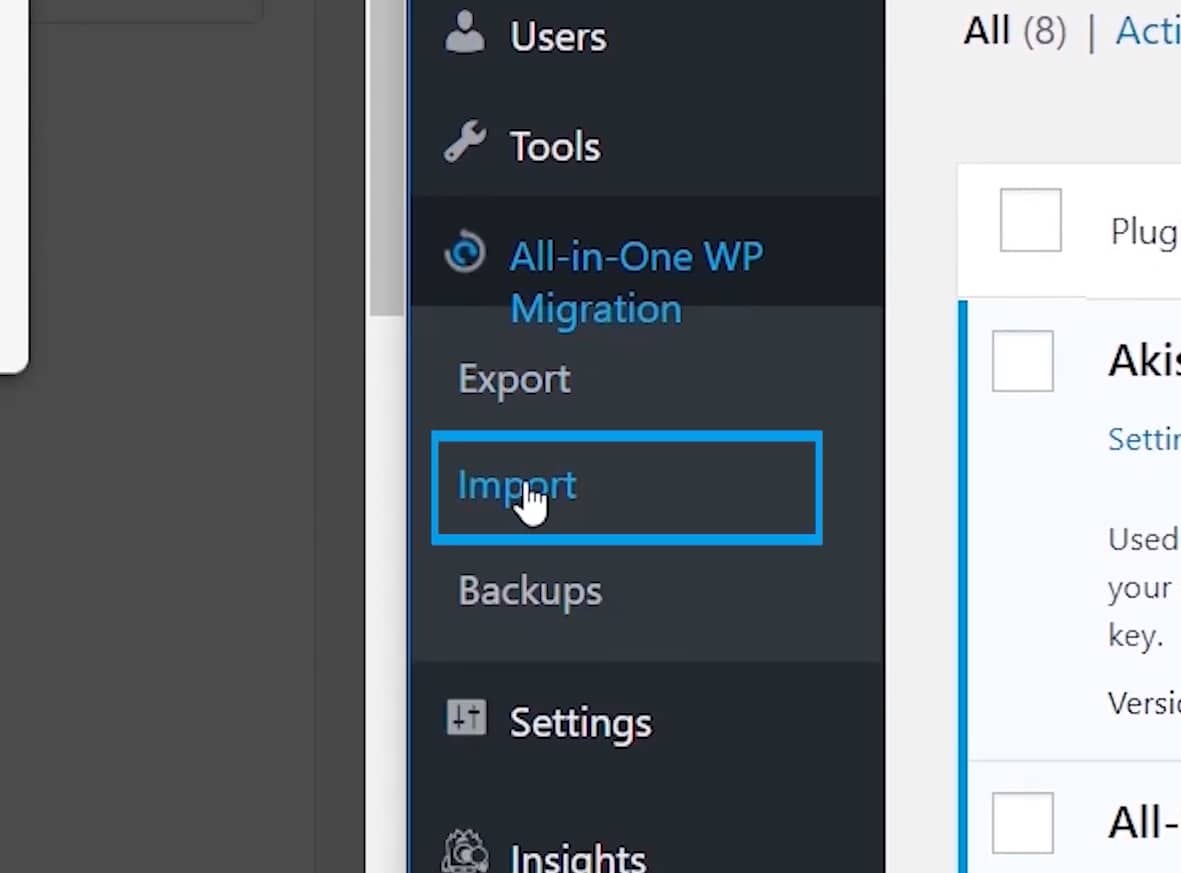
Now, try to install the same plugin on the site that you want to move to and then the transfer the whole site over. After this, scroll down the WordPress dashboard of that site until you find “all in one WP Migration” tab. Then click on “Export”.
Step 5: Export the site from PC
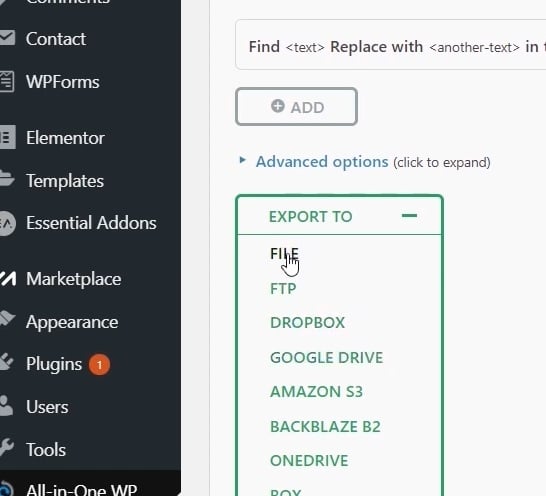
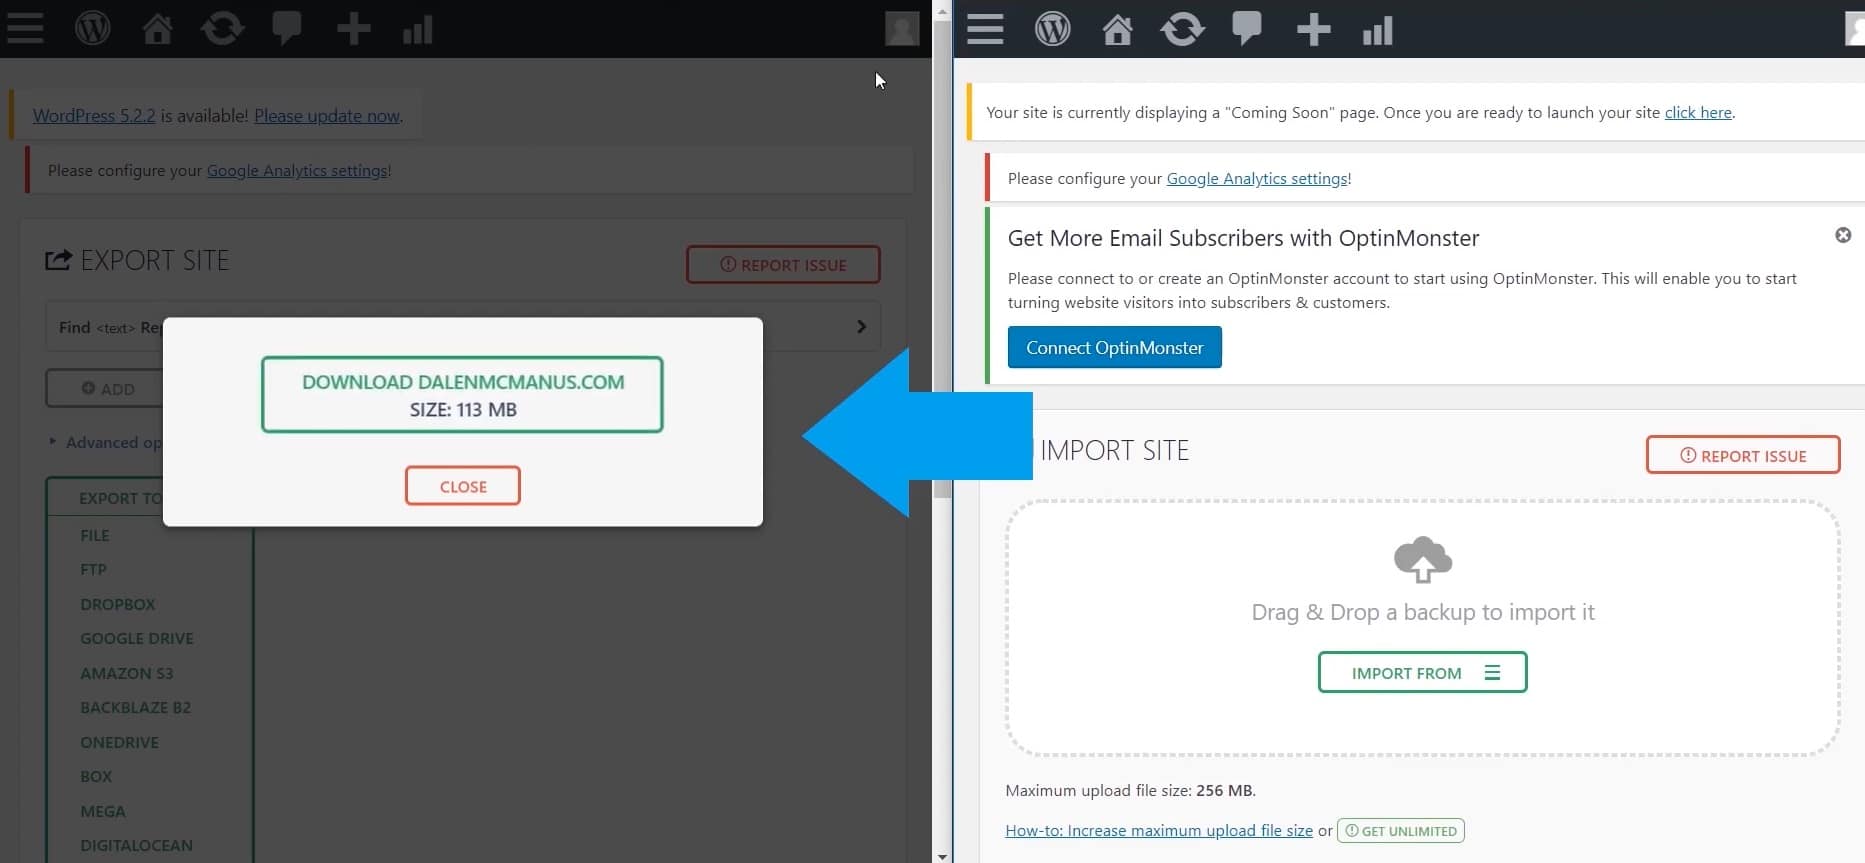
Now, hover over the export button and click on it. A quick tip before we go any further is to export your file into Google drive or any other storage space on the internet to access it from any computer. This way you can be ensured that you have a backup of your website. So, right now select the file (Incorporated with your site) and upload it. This will only take a few minutes.
Step 6: Move your downloaded file
Click on the download button to add your local website file. When it’s done, go ahead and move the file that we just downloaded from the old domain name to the new one. For this, again move to the dashboard, go back to “Plugins” and then “Add new”. After that, install the same plugin and activate it. Now move back to the menu, select “All in one WP migration” but now select “Import” and upload your downloaded file. You will see a warning symbol, click on “Proceed.”
Step 6: Relog into WordPress fresh install site
Now move to the site, for which you just brought a domain and select into “Visit site”. If the site hasn’t changed, re-log in to your WordPress account or refresh the page. You will be able to see that both sites are exactly the same, meaning that your site has now moved from a local server to a live one.
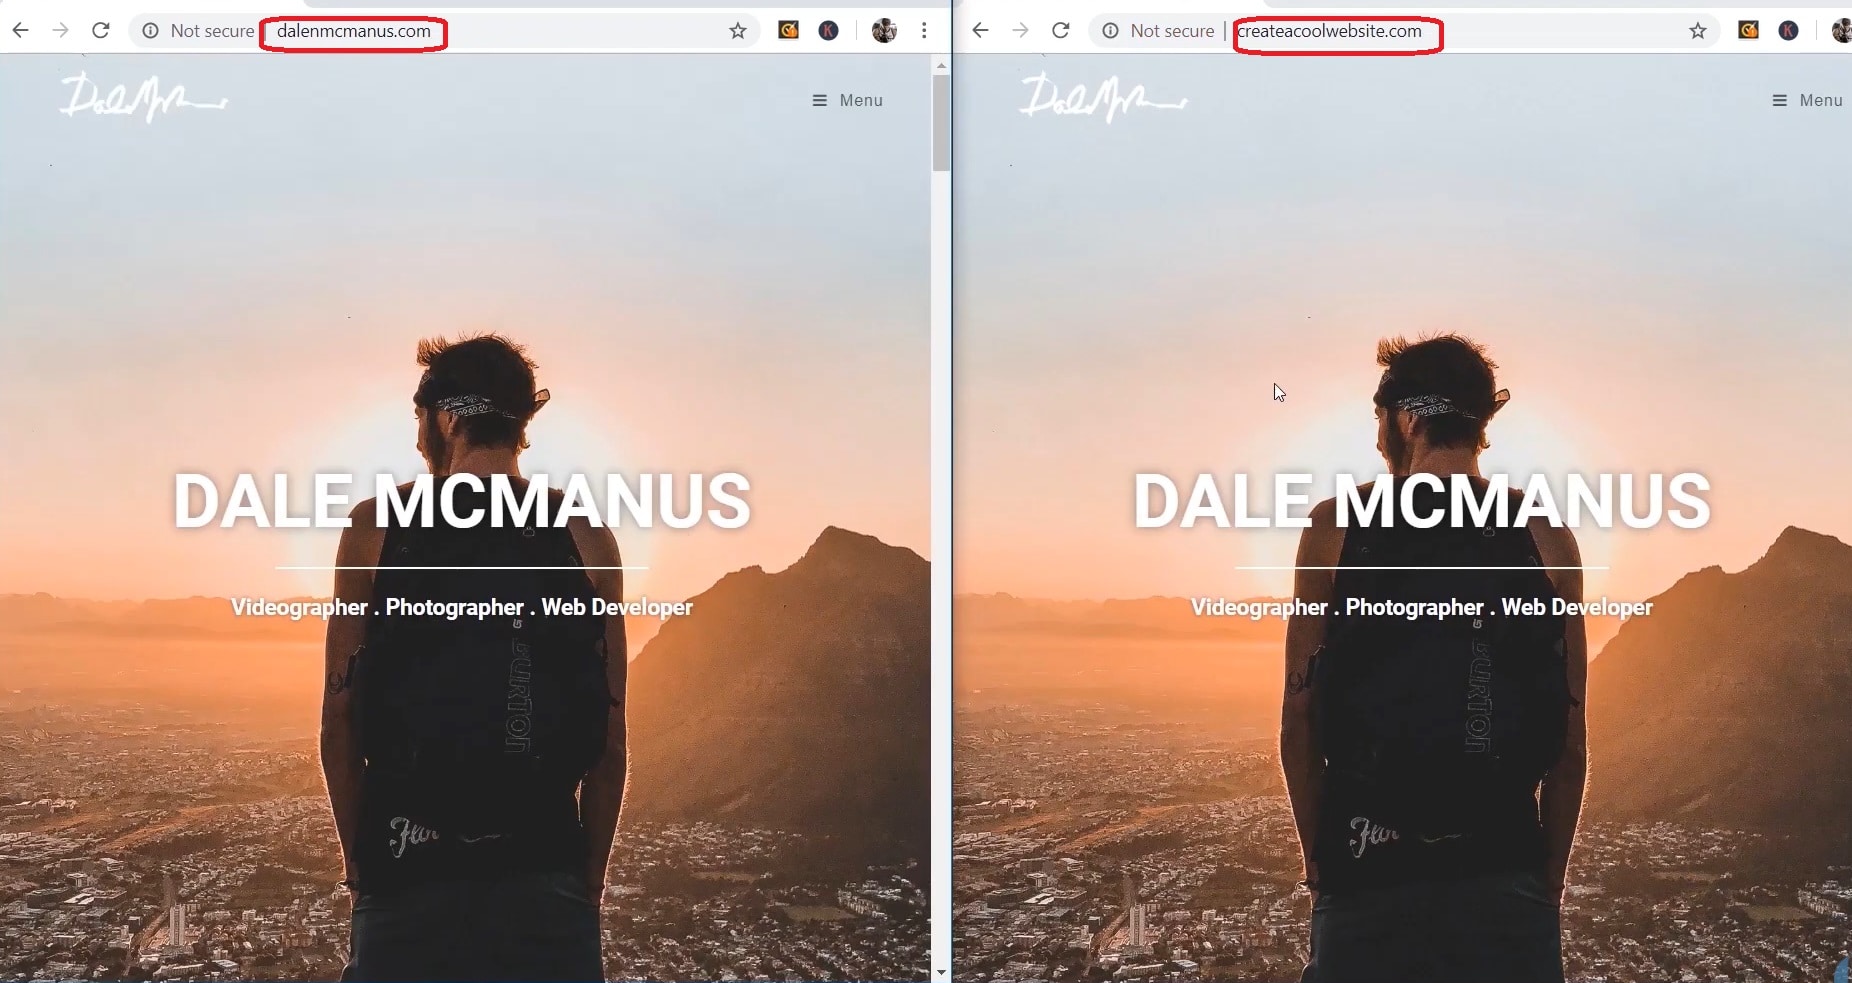
So, this was how to install WordPress on website from local server and then transfer it to live format. You can also install WordPress theme of your choice to make it more genuine or keep the old one, according to your preferences.
Note that, this method is the same as installing WordPress on Linux and even supported on Mac, for added convenience. Besides it’s more straightforward than if you install wordpress ubuntu, so it will save you time and resources.
HOW TO INSTALL WORDPRESS ON LOCALHOST BY USING XAMPP
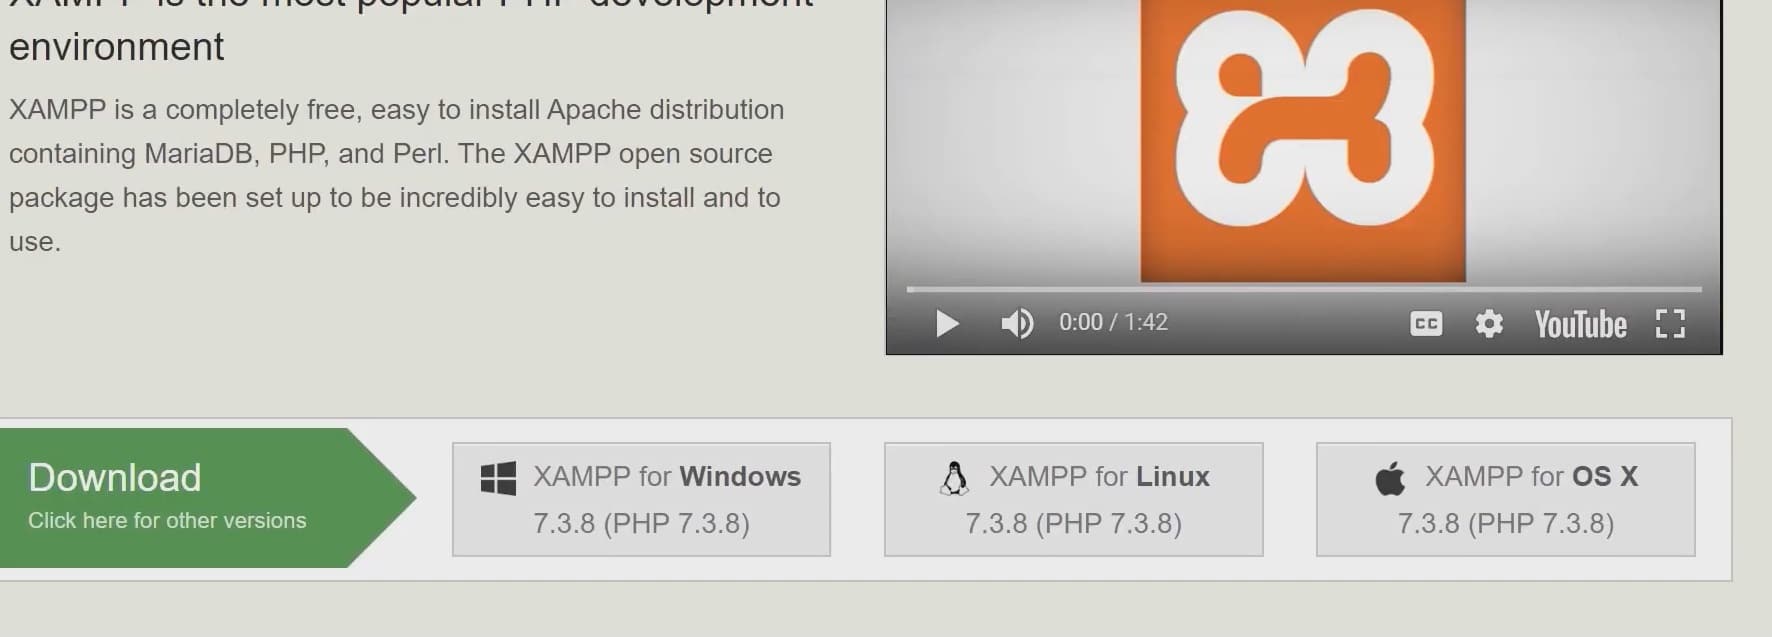
This leads us to over the last method in WordPress installation, which is by using XAMPP. You might be wondering what XAMP is? To be short, XAMPP is one of the many local server software that mimics the actual web environment and can be installed on PC, Mac, and Linux. It acts as one of the major Apache distribution that is open sourced (completely free) and can effectively work on Perl and Php.
WHY XAMP?
Most professional developers, as well as programmers alike highly, recommend XAMP as it’s one of the best local development environments (software) in the market. It will allow you to install new WordPress features, including light themes, in a blink of a second. The same applies to thousands of plugins out there.
Plus, you won’t have any complications as you upload your localhost changes, away from pesky hackers—besides, it’s always best to work remotely with no connectivity whatsoever. Regulating your website locally is exceptionally useful as compared to live condition. You won’t even have to pay for web hosting services to enjoy experimenting on the go!
With that aside, let’s start our wordpress installation on localhost guide.
Step 1: Downloading XAMP
Before WordPress installation, you need to download and install XAMP. For that, move to their official site and choose your operating system; downloading will start automatically after that.
Step 2: Installing XAMP
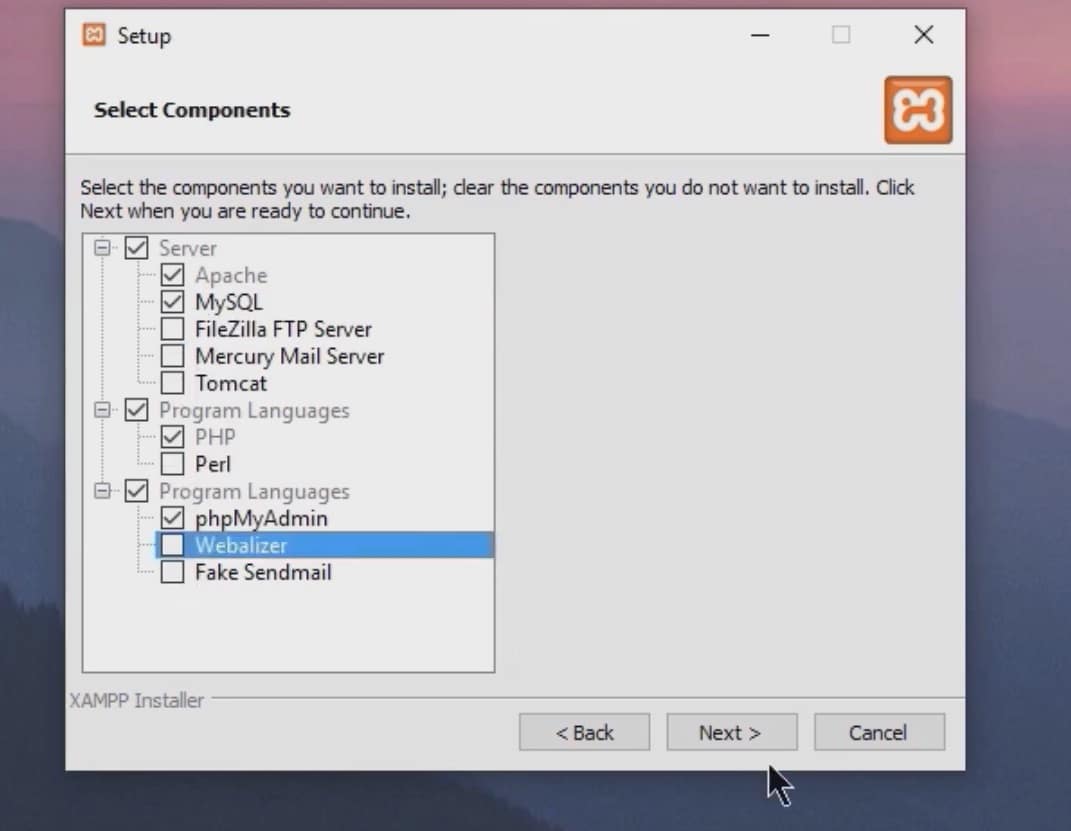
After downloading, open the XAMP installation file. You might face a warning termed as “New user account warning,” for that, click “OK.” Now move next until you see the component board. Select “Apache,” “My SQL,” “Php” as well, as “PhpMyAdmin,” while unchecking the remaining as you will only need them for WordPress installation. After that, select the installation directory and click “Next” until you see a loading window.
Step 3: Adjusting the control panel
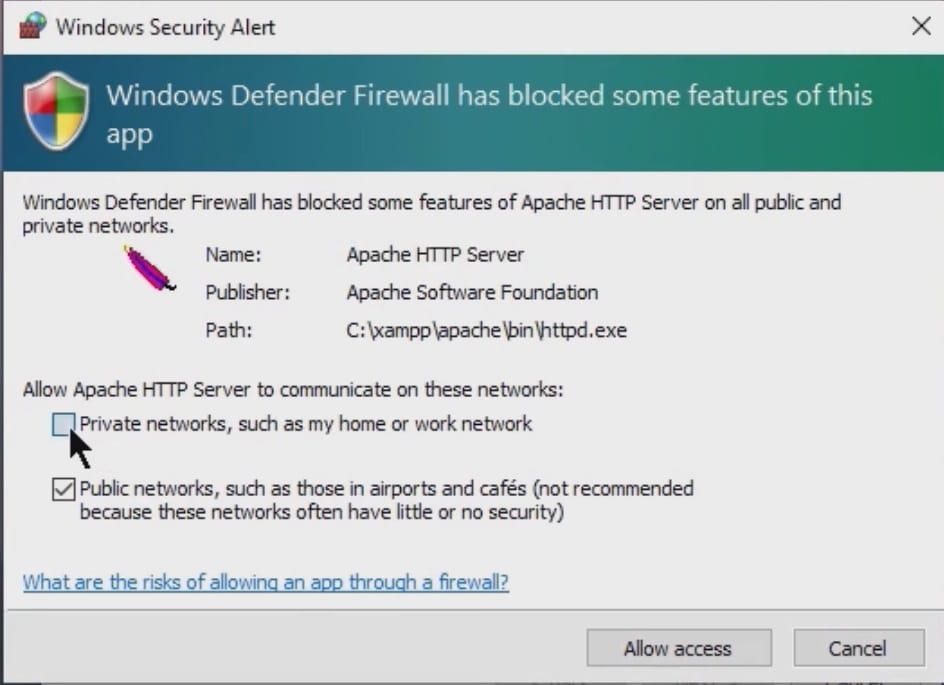
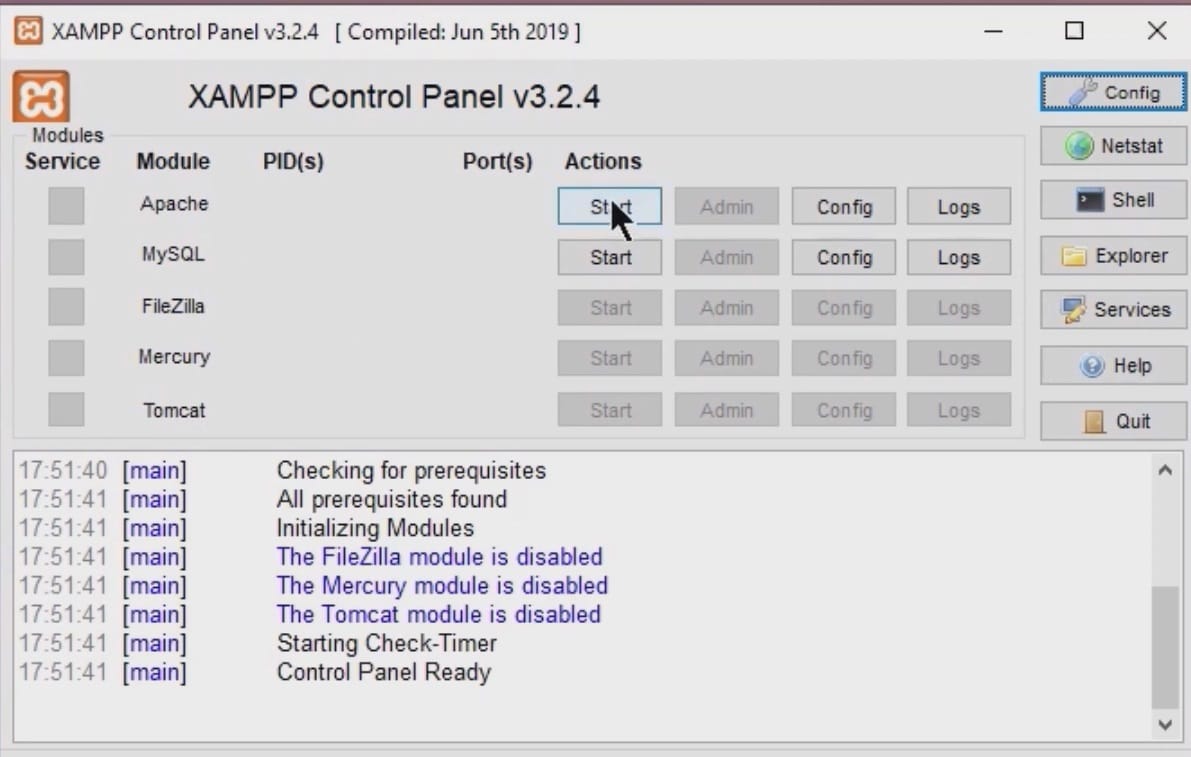
Now you might face a firewall defender warning as you complete the installation. For that, you need to check the “Private network” option while leaving the Public category as it is, or you can change it according to your preferences. After that, you will be greeted with the control panel of XAMP. The interference itself is relatively straightforward so that you won’t have any issues. Select the “Apache” installation by clicking on “Start” next to it and access its admin panel. The same goes for “MySQL.” It can now host any Php based software, i.e., WordPress.
Step 4: Configuring database
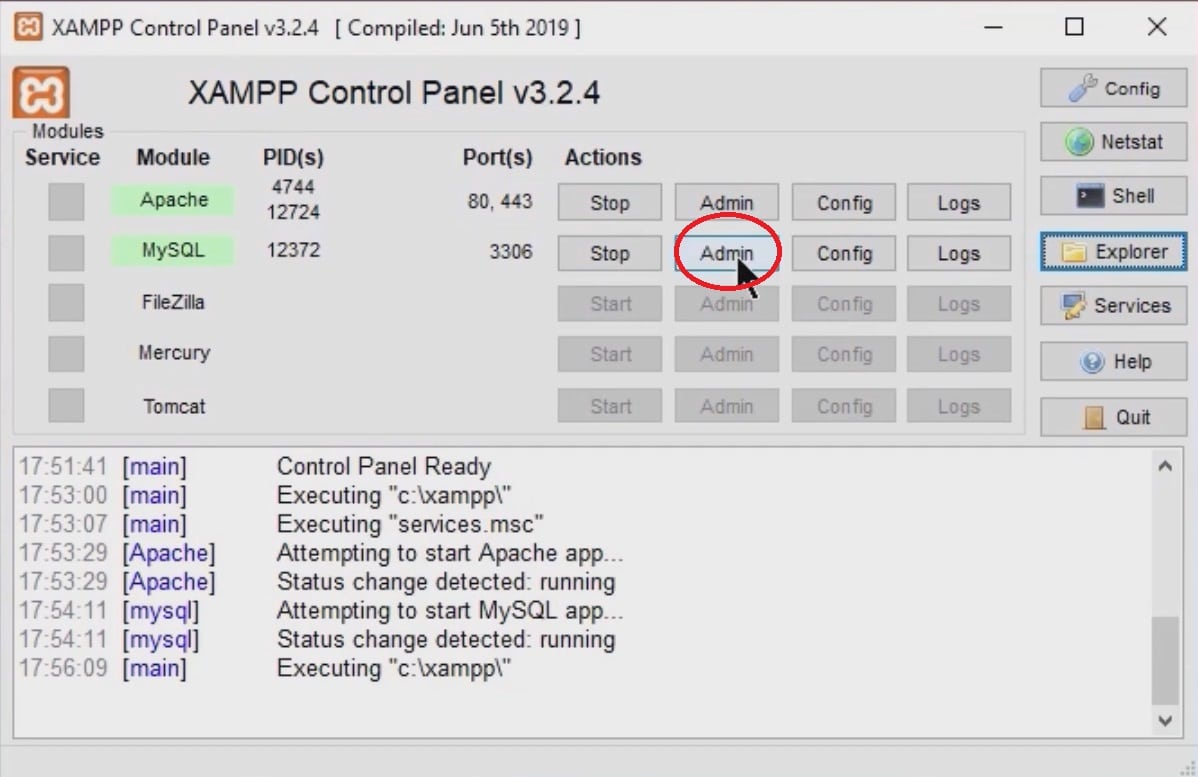
Right away, we need to move to WordPress installation locally with XAMP, which we just configured. For that, we first need to create a database on your local MySQL server. So, go to “PhpMyAdmin,” which can be archived by clicking the admin button next to MySQL. Once you’re on the dashboard, select the respective tabs, and create the database.
Step 5: WordPress installation and configuration
In this step, you need to download the latest version of WordPress. For that, go to wordpress.org, click on the Get WordPress button, and then download. Once downloaded, copy WordPress, create a new folder for your site and extract the WordPress installation file in that. Next, there will be a file called wp-config-sample.php”, in which you need to remove the word “sample.” Once done, open the WP config file and edit it. So, setup/enter your database name, user name, password within the sections as mentioned and save the file.
Step 6: Log in to your site after completing the installation
 Now, complete the WordPress installation by typing /localhost/(your file name) in the PhpMyAdmin panel. A WordPress official install setup window will appear. So, select your language, give your website a name, enter the user name and password, and click next. This will lead you to the login screen. After that, enter your password and user name and hit enter. Congratulation! You have successfully installed WordPress and now familiar with how to install WordPress on localhost.
In conclusion, just as you can install WordPress ubuntu, the process to install local wordpress through XAMPP is pretty much straightforward. With this method, you can develop and test your site safely on the system; instead, you install WordPress on GoDaddy(hosting). Its a great way to install WordPress themes as well as plugins and test the various features and experiment with different aspects of your site without concerning any issue. If you’re still confused, then you should definitely check how to install wordpress using softaculous, Top 7 DMCA ignored VPS in 2024, or 8 Best Web Hosting in Australia.
What directory to install WordPress?
As mentioned before, if you’re manually installing WordPress, upload it on the public_html folder to install it on the main directory/domain. But If you are installing it on a sub-domain, upload the WP files to that specific folder. I hope this answers your question of what directory to install WordPress.
How to Install WordPress on Linux?
To install Linux locally, you need to follow a specific method for that specific distro. If you’re a Ubuntu user, you can use this video as a reference:
How to Install WordPress Themes?
Installing a WordPress theme is easy, just open your admin panel/dashboard, navigate to appearance > themes & click add new. Now either search from the free catalog of themes or upload your desired theme, and select it.

")


 on WordPress Multisite")
